From Digitisers to 3D Scanning
3D Scanning is an integral part of advanced manufacturing. Especially for complex three-dimensional forms,
such as architecture and sculptural public art. As discussed in our article on the fabrication of Emily Floyd’s Poll, 3D scanning from a scaled
physical maquette is often the starting point for digital fabrication. The method used for scanning
maquettes effects the amount of detail captured in the scan. The quality of scans can impact the processes
involved in manufacturing. Over time this technology has evolved and changed. Scanners can now obtain
information in increasing detail. This detailed information assists in achieving higher accuracy, and
efficiency, from advanced manufacturing technologies.

Looking back to Digitisers
In this video excerpt of a 60 minutes segment on Frank Gehry’s work from the 1990s shows an early form of 3D scanning for digital fabrication. This type of scanning involved using a digitiser to map out a series of points, in three-dimensional space. From these points, CAD software is used to create a three-dimensional shell of the form. This shell would be then scaled up and used for the basis of creating the model for a building. This type of scanning provided some simple spatial information for designers to work, but it was limited to points in three-dimensional space. People were then required to add in data, using CAD software, such as materials and textures to each surface of the scanned 3D model.
Testing new scanners
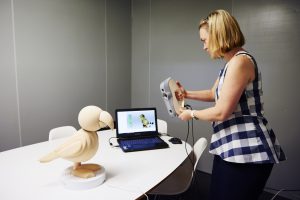
As 3D scanning technology has progressed, 3D scanners can collect more information about the object. The advances in these technologies are pushed forward by vision, sensor, infrared, and lighting technology. Contemporary scanners can gather detailed information about the surface of an object including its texture and materiality. As part of our research, we are experimenting with different scanners to test out their capacities and ascertain which scanners are best suited to different materials and projects. The video below features Dr Muge Belek Fialho Teixeira and Dr Helen Hou, our two postdoctoral research fellows, testing out a spider scanner.
As part of this process, the researchers tested out three different types of scanners; a Kinect v2, an
Intel Real Sense, and an Artec Eva. Each scanner produced different results depending on the technique used
for scanning and the material of the object. The researchers tested scanning timber, foam, and metal with a
matte finish, and metal with a reflective surface. As you can see from the chart below, each scanner
produced different results.

The next phase of the project involves attaching the scanner to the robotic arm, which will provide it with
vision. With the scanner, the robotic arm is able to move around an object and scan it from various angles.
Additionally, our team are developing new software that will enable the robotic arm to use this scanned data
so that it can perform tasks such as fettling of sheet metal and polishing. Effectively, we are aiming to
equip the robot with vision so that it can undertake a wise range of automated tasks.